Account and security.
This page covers the entire life cycle of Aivory accounts: registration (mailbox authentication, slide authentication), login, two-step authentication (2FA), third-party login and identity source binding, password and image management, login devices, account deletion, and appearance settings, interface language and PWA installations.
Fully new deployment. ** The first account. ** Do not go through the registration process of this page, but create and automatically become an administrator by initializing the page. The first launch.。
Registered
Visit to /register Or “Register Now” on the login page.Registration form includes:
| The field | Requested |
|---|---|
| The name | Filled as a name. |
| The mailbox. | Required for registration and verification. |
| The code | At least 8 characters, enter the box and switch to "Show / Hide Password" |
| Selection of terms | Agree to Terms of Service and Privacy Policy |
The administrator can close the new user registration in the background (Place set up. Registration is not available after closing.The same network is limited to the number of accounts that can be registered per day and will be prompted to try again later.
Verified slide.
When the administrator opens the Registration Authentication Code, the "Please complete security authentication" pop-up pops up before submitting the registration:
- The bullet window opens to load a puzzle, and drag the slider below the puzzle block to the gap.
- Release the slide. ** Immediate examination ** Successfully showing green pairs and automatically continuing registration; failure showing red forks, replace a new puzzle.
- In the upper right corner there is a refresh button that can be changed at any time.
A one-time pass certificate (valid for 10 minutes) is issued after validation, and registration requests are carried automatically without the need to repeat the operation.
Postal verification code
When the administrator opens Mailbox Authentication (the administrator needs to have the SMTP message in the background first), register for submission and go to the authentication page:
- System to register mailbox. ** Six digital certificates. ** effective within 10 minutes.
- The Input Framework ** 6 automatically submitted. ** The full authentication code will also be submitted immediately, without the need to tap the button.
- Unreceived emails can be "Resend" to get a new code.
The same certificate. ** Five consecutive losses are cancelled. ** If you continue to enter any code is invalid, you must "re-send" to get new code.This is the protection mechanism against violent speculation, the reset code for the password is also applicable.
Authentication is activated by after account and automatically logged in, and you will see a welcome guide for the first time.
Registered
Visit to /login Enter your email address and password. The login page also provides:
- ** Third Party Login Button ** View when the administrator has configured the OAuth provider (see below).
- ** Forgot the password? ** Return to the flow.
Find the code.
- 在
/forgot-passwordEnter the mailbox and click "Send a reset verification code". - The six-bit reset authentication code is sent, valid within 10 minutes; the page prompt does not reveal whether the mailbox has an account registered.
- Enter an authentication code and a new password (at least 8 characters) and click on Reset the password.
- After successfully reset, re-log in with a new password.The reset code is also protected by the "Five Wrong Reset".
Verification in Two Steps (2FA)
Aivory supports standard TOTP two-step authentication (30-second window, 6-digit), and is compatible with all mainstream authenticators such as Google Authenticator, Authy, and Password.
Opened
The path: set up ** The Account **→ Secure zone → Two-step authentication → Open:
- The pop-up displays a two-dimensional code with the set API key, scans the authenticator app with the code, or manually enters the API key to add the time-based (TOTP) entry.
- Enter the six-bit authentication code shown in the app to confirm that the binding is completed.
The API key is encrypted on the server side.
Registration process after opening.
- Enter the mailbox and password, then go to the "two-step authentication" page. ** Not yet registered. ** The system only issues a short-term ticket (standard 5 minutes valid).
- Enter the six-bit authentication code in the authenticator to complete the login.
Rules of Safety:
| The Rules | behavior |
|---|---|
| Overtime bills | If the validity period is exceeded and the verification is not completed, it is necessary to start again from the password step. |
| Wrong burning bills. | The same ticket. ** Five consecutive errors are burned. ** The ticket can not be intercepted within the validity period, the code must be re-entered. |
| Verify the security code. | Each verification code is in its time window. ** Only used once. ** Repeat submission will be rejected. |
If 2FA is enabled with an OAuth account, the same verification code is required when logging in.
closed
Set → Account → Two-step Authentication → Close, enter the authenticator. ** Current verification code ** Confirm after shutdown. shutdown will not force you to kick out other devices that are already logged in.
Recovery (Lost Authenticator)
Aivory does not provide a one-time recovery code. If a switch or lost authenticator causes you to fail to log in, contact your administrator: the administrator can reset (off) two-step authentication for you in the background user management, after which you can log in and re-bind with a password, see Users and quota。
OAuth Third-Party Login and Identity Sources
Log in with a third party account.
Administrators can configure Google, GitHub, Apple, or any OIDC provider in the background; the corresponding login button will appear on the login page after configure.
- If a third-party mailbox corresponds to a local account, associate and sign in to that account.
- If it does not exist, a new account is automatically registered.
Identity source binding (binding multiple login methods)
The path: set up ** The Account ** The Identity Source zone (only displayed when the administrator has configured the provider or you already have a bundle).
- ** List is bound. ** Each display the provider icon, name, third-party mailbox and binding date, with the "Remove" button on the right.Users who have registered or logged in with a third-party account naturally have one.
- ** Linked list ** For each provider that is configured by the administrator, click “Bind” to skip third-party authorization, then return to the account page and ask “Binded”.
- The same account can be linked. ** Many more ** The provider selects one at the time of registration.
The Binding Rules:
| circumstances | behavior |
|---|---|
| The same third-party account is linked to other local accounts | Failed binding, the message "This account has been linked to another user" will never overlap or replace |
| No password set and only the last identity source remains. | “Remove” is disabled and asks to set a password first to prevent locking yourself out of the door. |
| Providers are disabled by the administrator | Already bound is still displayed (marked "disabled") but cannot be used for logging in |
The binding process does not create a new account or issue a new session, but only hangs a third-party identity onto the account that is currently logged in.
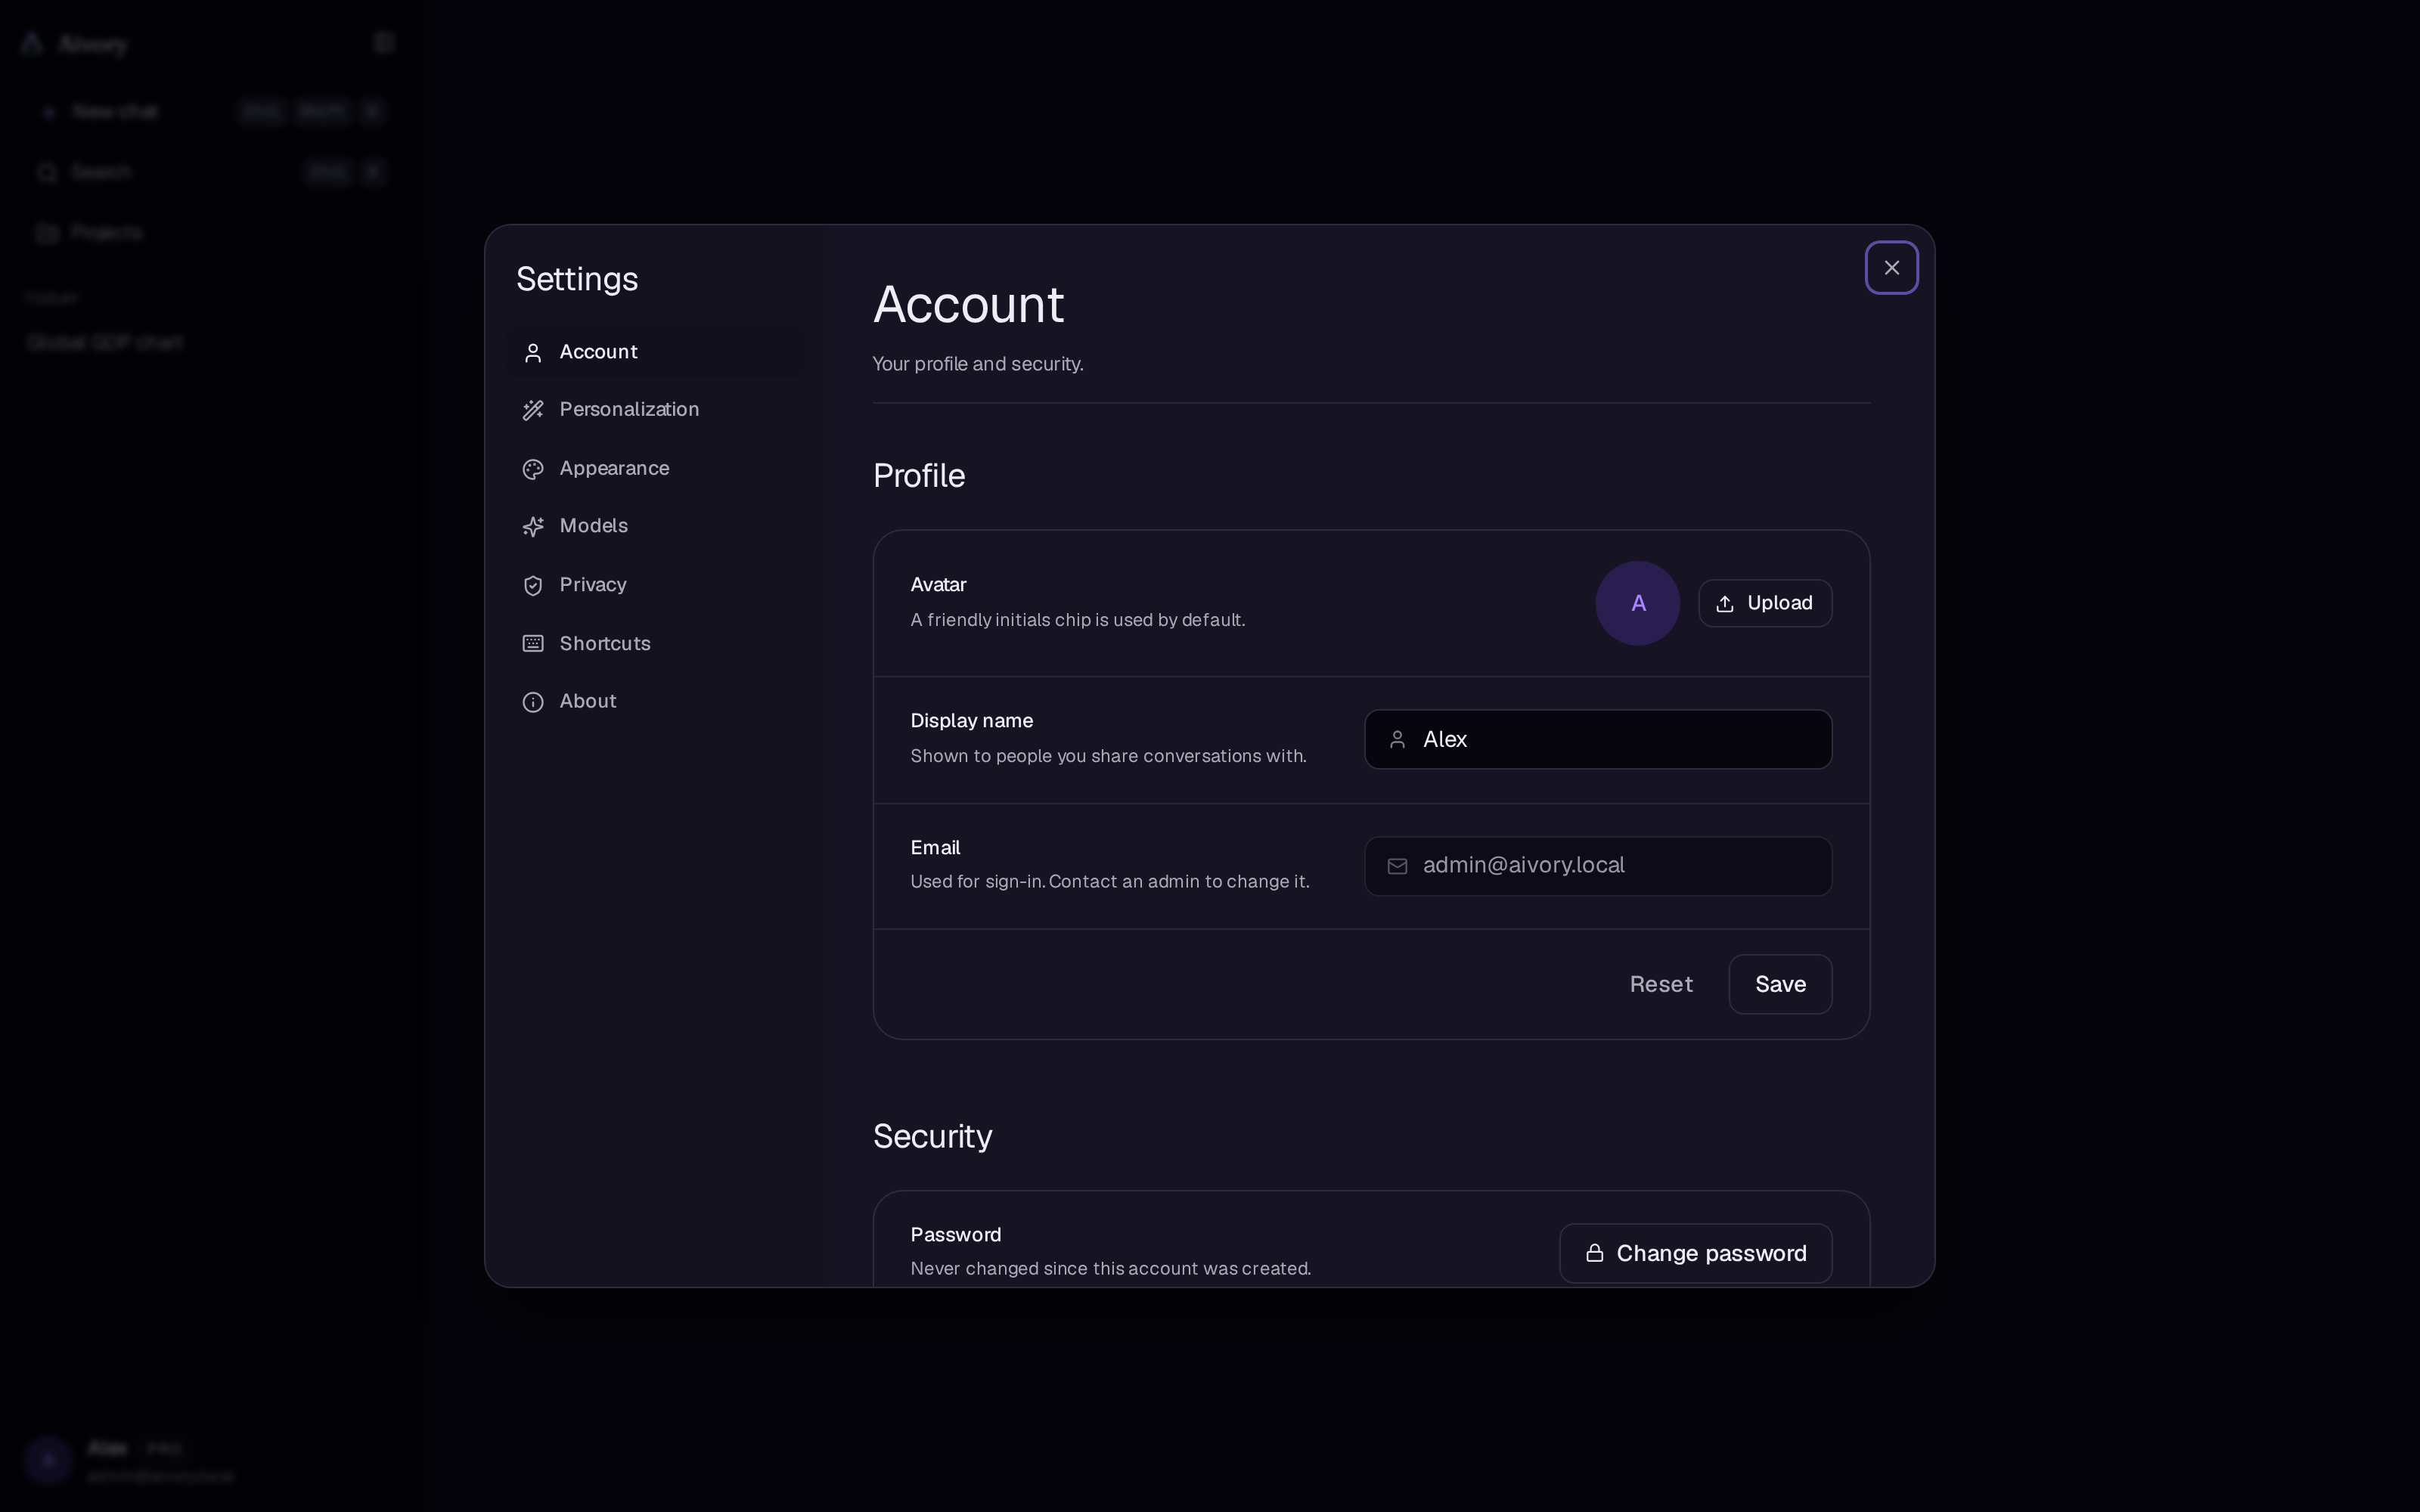
Password and personal information.
The path: set up ** The Account **。
Modifying the code.
The “Secure” zone’s “Code” line is displayed ** Last time modified. ** (True record; if the password has never been changed, “Not changed since the account was created” is displayed).
- Enter the current password and the new password (at least 8 characters).
- Successfully modified ** Automatically withdraw from registration. ** You need to re-log in with a new password, and there is also a corresponding hint in the pop-up window.
Head as
The headline in the Personal Profile area supports uploading, replacing and removing; color blocks with the first letter of the name are used when not set.
The uploaded photos will be on the browser. ** Automated compression ** The maximum edge is shrunk to 512px and pressed down to approximately 240 KB in JPEG, so direct upload of the mobile phone map will not be rejected due to the volume limit.
Name and mailbox.
- ** Show the name. ** You can change the name at any time and share the session with others in the workspace.
- ** The mailbox. ** For login, the lock on the interface cannot be changed manually, please contact the administrator if you need to change.
Log in equipment (active session)
The Active Session section lists all the devices currently logged in to your account:
- Each device (browser/system) displays an IP-based location (internal network displays “local network”) with the most recent active time, with the current device marked “current device/using”.
- You can either “exit from this session” or “exit from other sessions” (preserve the current device) separately.
Deleted Account
“Delete Account” in the “Dangerous Operations” section at the bottom of the page: After entering the password confirmation, ** permanently deleted ** All your session, memory, and account data cannot be recovered. Exporting personal data。
External settings
The path: set up ** Externality **。
| Establishment item | Optionally | Preserving the location. |
|---|---|---|
| The Color (Theme) | Light / Dark / Following system | The browser. |
| Subject color (accentuated colour) | Purple (default) / Blue Lake / Red Tree / Blue Tree / Blue Tree / Rose / Single Color | Account (synchronization across devices) |
| The language | Enter the language, see the following section. | The browser. |
| The distance (density) | Compact and relaxed. | The browser. |
| The broad conversation. | Five-tier adsorption sliders: narrow / medium / wide / wide / ultra wide (the new account is "all wide" by default) | Account (synchronization across devices) |
| User Message Markdown | Switch: Render the message you send with Markdown (code blocks, tables, formulas) | Account (synchronization across devices) |
| The word | S / M / L (Orthodox benchmark 14 / 16 / 18 px) | The browser. |
| Writing | Geist / Inter / System Fonts / Fraunces | Account (synchronization across devices) |
Explain to:
- The theme color affects the emphasis color of the main operating button and the focus ring, and comes into effect immediately after selecting.
- "Chat width" controls the width of the heart of the message column, from the narrow heart to the ultra-large array that occupies the window, each array retains a proportional white; drag the slide or click the scale label can be switched.
- When selecting "Fonts" (Fraunces), the full title of the site switches with the original text and there is no mixture.
- Items marked as "Account" will be written into the user settings on the service side and will be automatically restored after logging into the device; Items marked as "Native" will only be saved in the current browser.
The interface language.
Aivory’s full interface (including admin console, legal page, error message and Toast) is available in 5 languages:
| The code | The language |
|---|---|
en | English |
zh | Shortly Chinese |
zh-Hant | Large Chinese |
ja | Japanese Japanese |
fr | Français |
- Automatically selected by browser language at the first visit (the area variants are automatically mapped to
zh-Hant)。 - It can be switched from Settings → Appearance → Languages at any time and comes into effect immediately.
PWA installation
Aivory is an installable PWA (Progressive Web Application): a standalone full-screen window without a browser address bar with a standalone icon after installation.
| The Platform | Method of installation |
|---|---|
| Chrome and Edge | The “Install” icon on the right side of the address bar, or “Install Aivory” in the browser menu |
| Android Chrome | Browser menu → “Add to main screen” / “Install applications” |
| iOS Safari | Share button → “Add to main screen” |
Characteristics of installation:
- ** Full independence **:standalone mode, no address bar; the interface has been adapted to the Liu Hai screen and the safety zone of the bottom line.
- ** The fast way. ** The long-click (or right-click) app icon can directly "New chat" into the new conversation.
- ** Updated immediately ** Aivory's Service Worker does not deliberately cache page resources, and the latest front end on the server is loaded every time it is opened, and it does not get stuck by the old versions.
The browser is there. HTTPS ( or localhost Enabling Service Worker registration and installing PWA. If your deployment is HTTP-only, chat functionality is not affected but cannot be installed as an application; you can install it after HTTPS for a domain name, see The reverse proxy。
Related pages
- The first launch. Initialize an administrator account and welcome guide.
- Sharing and data Export, import and memory management.
- Place set up. Registration switches, slider authentication, mailbox authentication and SMTP configuration (administrator).
- Users and quota Administrator-side user management with 2FA reset.